
So you think it might be time for a new set of strings for your compound bow? If it’s been a few years since you’ve replaced them, or you notice some separation in the serving strands, or significant fraying, then you’re probably right. It is time.
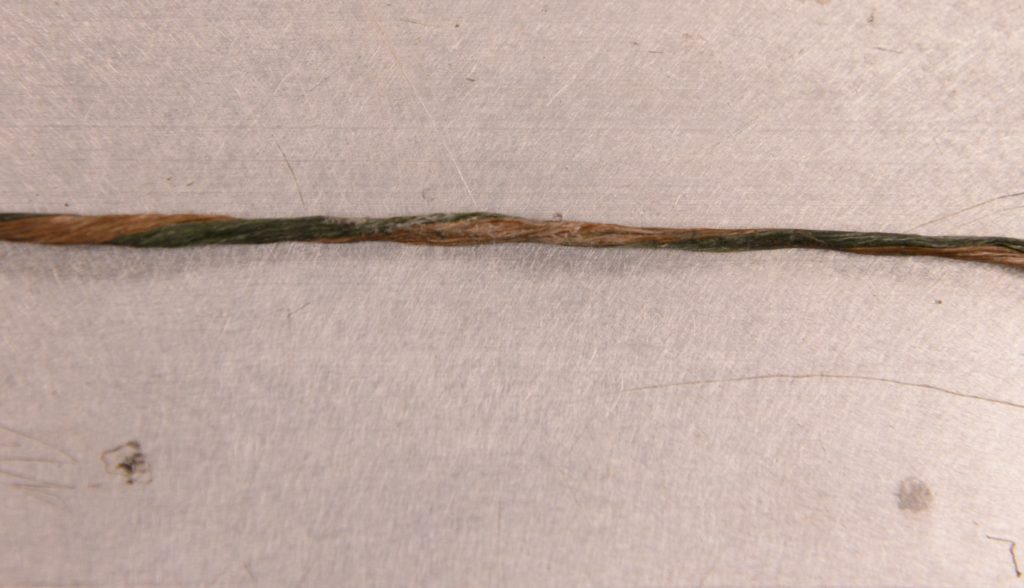

This compound bow string shows clears signs of excessive wear and needs to be replaced.
Why not do it yourself? It will save you time away from your bow, which you would have to drop off at your local – or not-so-local – pro shop. And it may also save you some money.
To change the cables and or the bowstring on a compound bow you will need a bow press. That’s an additional expense maybe some bowhunters don’t want to take on, and it’s totally understandable.
But hey, why not get a group of buddies together and split the cost for one press that all can use? You can find a good press for under $500, and when you have a press, you open the door to being able to do all kinds of repairs and experimentation with peep sights, cable-driven arrow rests, string silencers – not to mention changing strings.
A good bow press is a must-have for the DIY bow technician.
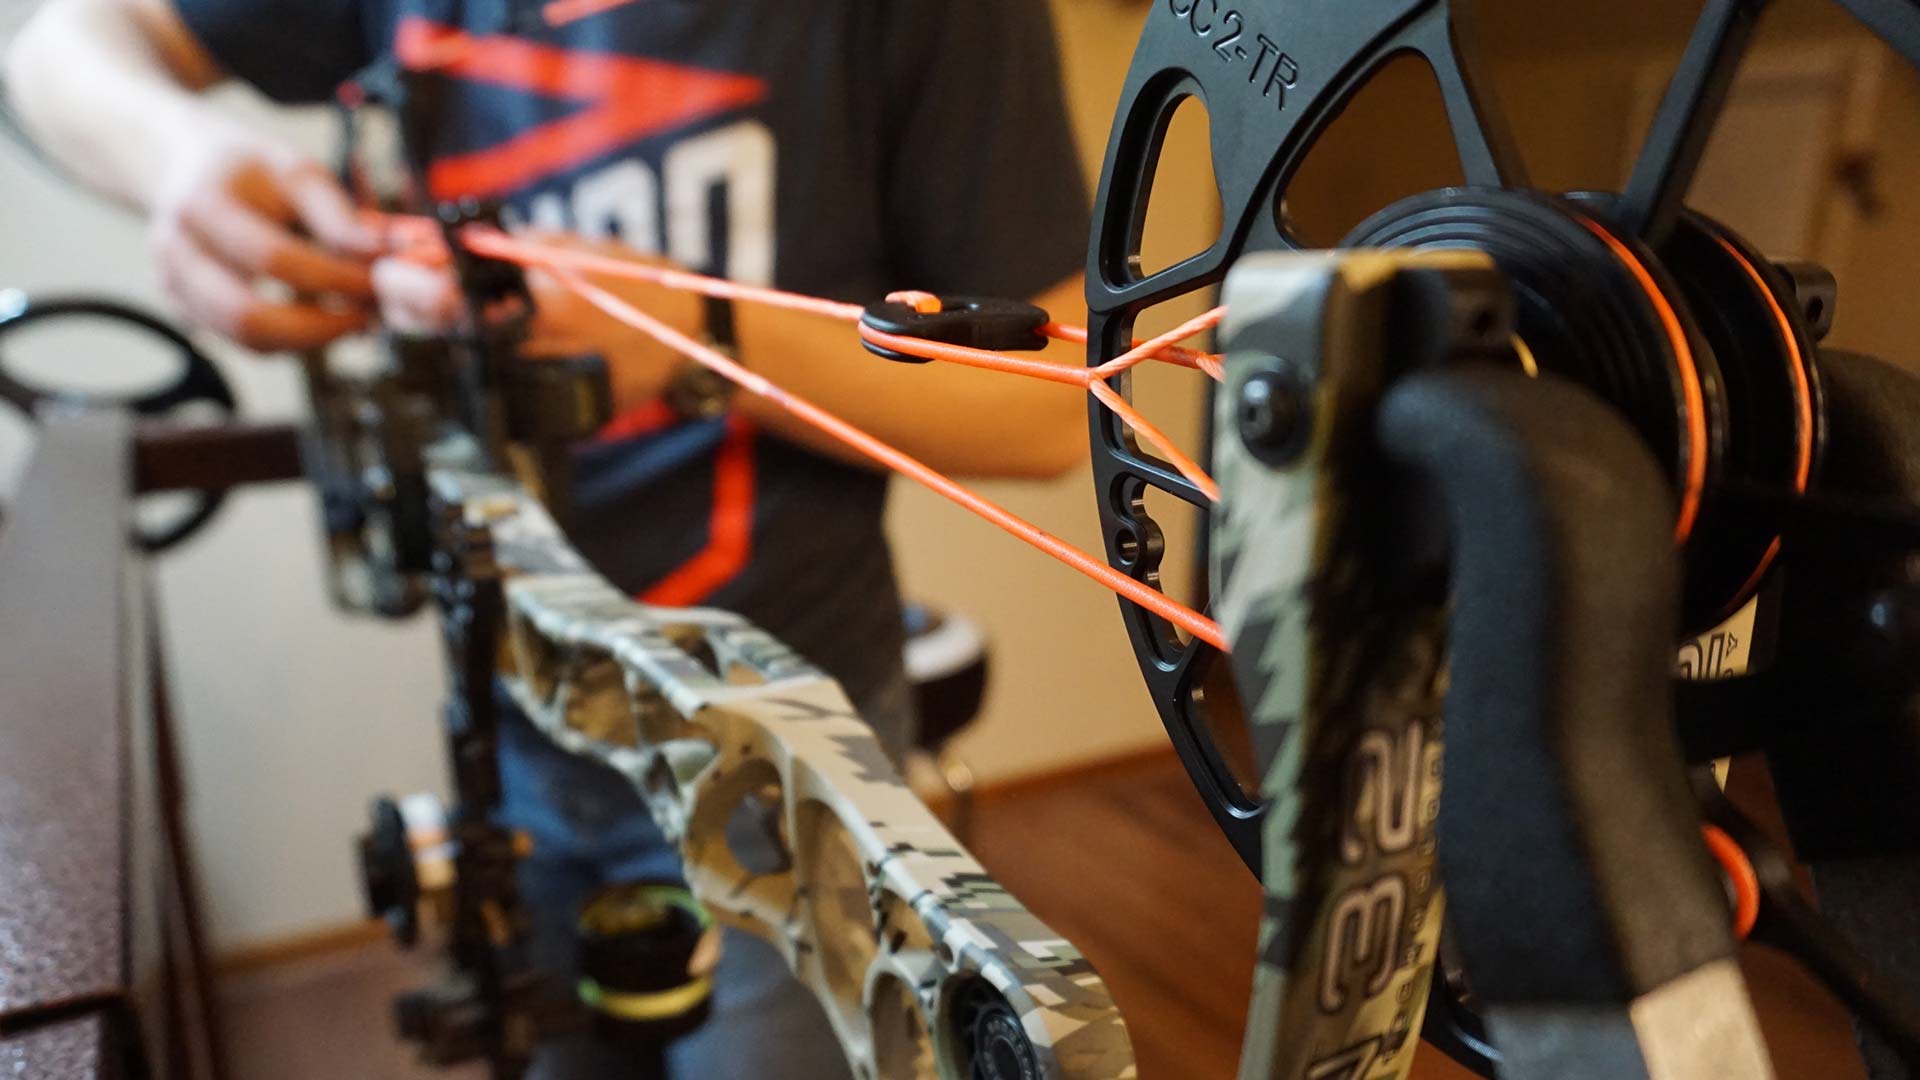
So let’s assume you have a press to work with. What do you need to know about replacing the strings yourself? For starters, when we say “strings,” we’re talking about cables and the bowstring. On some bows, that might be two separate strings, while most have three. You’ll hear talk about buss cables, control cables, power cables. Don’t worry about what they’re called.
When you order a set of strings, tell the string builder the exact model of your bow, the draw weight and the draw length. That will give them the information they need to build to the bow manufacturer’s specs.
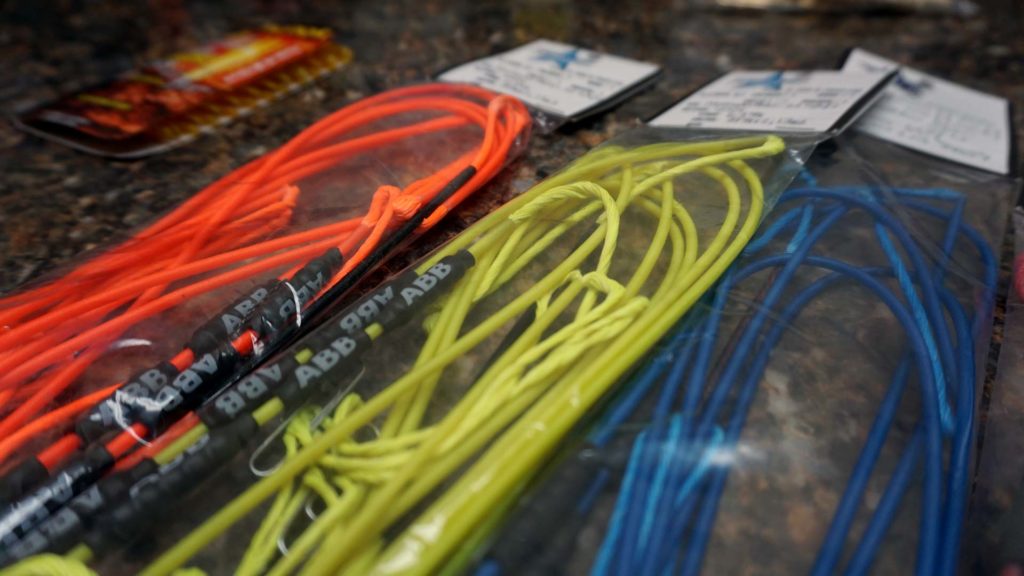
Putting new strings on your bow is a great way to customize it to your personal color preference. Platinum series bow strings from America’s Best Bowstrings, seen here, are available in a variety of colors from bright and loud to dark and stealthy.
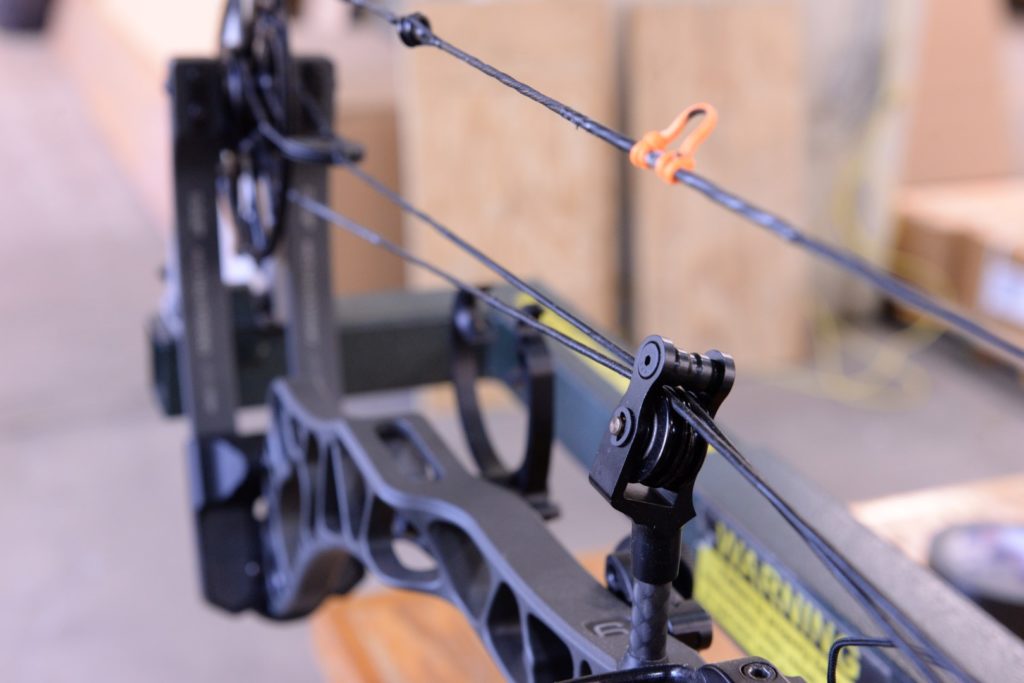
With your new set of strings in hand, set your bow into the press with just enough tension on the limbs to hold the bow in place. Get two pieces of tape, place one on each cam, right behind the limb tip. Use a marker to draw a line on the tape, directly even with one edge of the limb. This will allow you to get your rig back to factory specs with the new strings installed. What you’re looking to achieve is for the axle-axle measurement to match the specs, and for the cams to return to the same position they were in when you started.


Attach a piece of tape to the cam and mark the limb position before you start. Some bow manufacturers, like Mathews, provide timing marks or holes on their cams that you can use as well. In the above photo you can see the timing hole on the far right of the cam. Your cable should run through the middle of this hole to ensure your cams are timed properly.
At this point, experienced bow techs can press the bow, remove everything and put on the new strings knowing exactly where everything goes. If you’re learning on the fly, try to replace one string or cable at a time. This way you won’t get confused about how to put it all back together after you’ve taken it apart. It’s critical that you replace the strings exactly how you found them
For example, with a Mathews Halon 32 roller guard, it matters which cable is in the left track and which is in the right. If you switch them, you’re going to have issues.
It’s important to know how the cables run through the roller guard. Taking a couple photos of your bow before you disassemble it is another great tip. This way you have something to reference if for some reason you find yourself not remembering exactly how everything was put together.

Remove one end of the bowstring from the cam and immediately replace it with the new string.
When you need some slack in a cam in order to rotate it, simply remove the bowstring from that cam, and it will turn to give you access to the cable post. When you’re done, replace the bowstring.
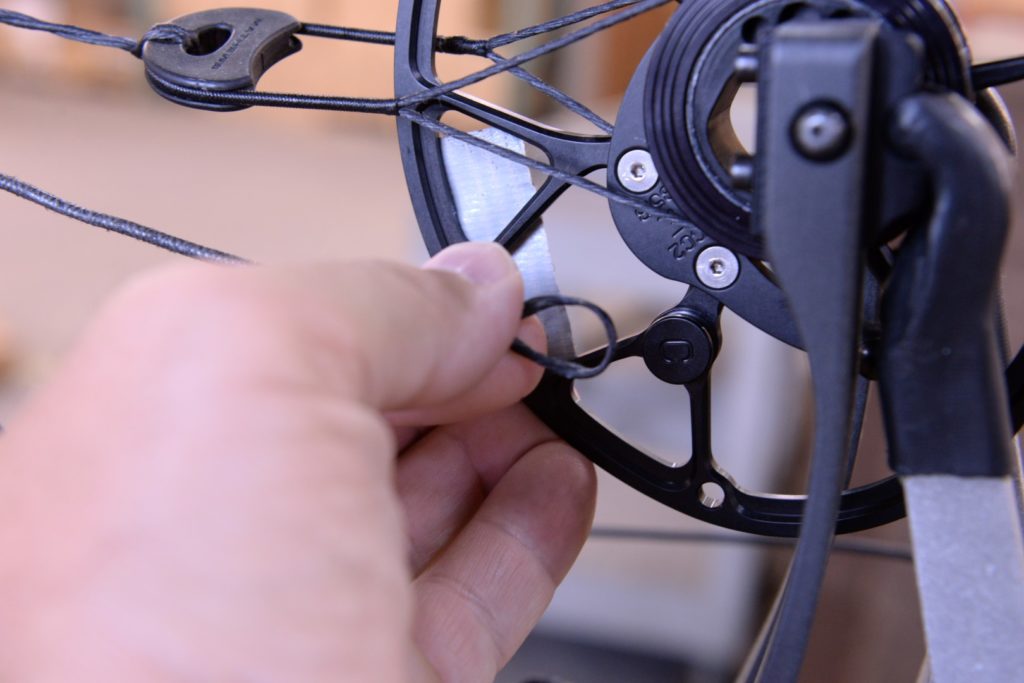
Removing the cable end.

Mathews bows with the AVS cam system like the Halon 32 require removal of the cam to replace the yoke cable. When removing the cam make sure you unpress the bow and take the axle out when there is no tension on the limbs.

When everything is replaced, check all of the connections and places where strings wrap around wheels or run through cam grooves to make sure everything is seated properly. Slowly unpress the bow while holding the bowstring taut. That will insure that nothing comes unseated.
With the bow unpressed, check your markings on the tape on your cams. If they don’t line up with your limbs, then you’ve got timing issues. With correct cam timing, both cams – assuming it’s not a single-cam bow – should rotate identically, and reach full draw at the same time. If they don’t, you’ll have tuning and accuracy problems.
Next, draw back the bow with a buddy watching and have him tell you which cam reaches full rotation first. You can tell by looking at the draw stops. Even better is to get a draw board to complete this task. A draw board is a device that allows you to hook the bowstring to a crank and draw it back with the ability to lock it in place anywhere in the draw cycle. There are several commercial draw boards on the market that you can buy, or many people prefer to build their own. A quick search on the Bowhunting.com Forum will return several design ideas and DIY instructions for building draw boards, should you desire.
You want to identify which cam reaches full draw first, and then put twists into the cable that’s attached to that cam. Put in a couple of twists and draw again. Repeat this procedure until the cams are even.
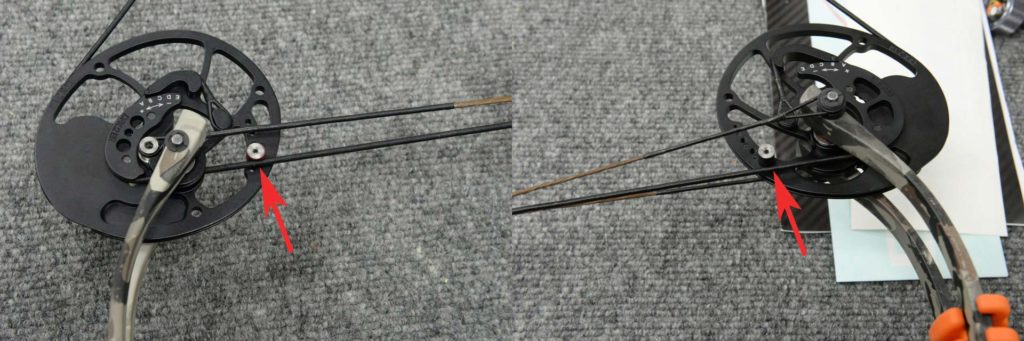

Here you can see the draw stop on the left is touching the cable, but the draw stop on the right is not. This means the cams are out of time (sync) and your cable length needs to be adjusted.
With single cam bows there still is a proper way for the cam to rotate. There is often a hole in the cam identified by the manufacturer as the timing mark, and the goal is to get the cable right behind that hole directly in the center. Go through the same cable-twisting process to get that cam aligned properly.
Once the timing is set, check your markings on the tape on your cams again. At this point, they should either be back to the correct position, or off by an equal amount. Add or remove identical twists to each cable until the markings are back to the original setting. Adding twists will rotate the cams backward; removing them will rotate the cams forward. (Note: If your string and cables are the proper length, this phase should require no more than a few twists in the cable to achieve factory specs. Don’t go crazy with twists.)
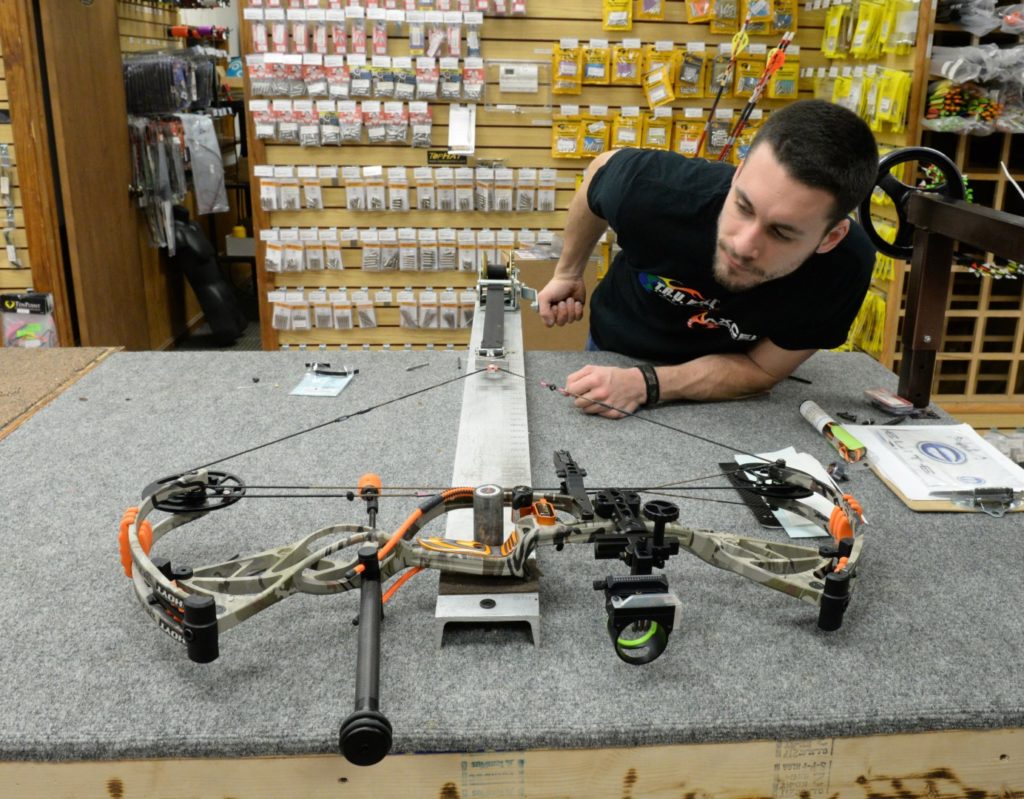

Using a draw board to check cam timing.
If you’ve got a bow that has yokes that attach to the outside of the limbs at the cam axle, then you’re going to have to check for cam lean. You want the cam to roll over perfectly vertical in the cam path for optimum arrow flight.
Let’s say you draw the bow and the cam is leaning left. Press the bow and put twists into the right yoke, while taking the exact same number out of the left. This will pull the right limb tip down and allow the left to rise, which will move the cam top to the right. If you don’t twist and untwist the opposing yokes identically, you’re going to mess up the timing you just set. Keep playing with the yokes in this fashion until the cam is vertical.
And that’s all there is to replacing your compound bow strings. Now you can begin re-installing your accessories, such as the peep sight, limb-driven or cable-driven drop-away rest, etc. Your new set of strings should give you a couple more years of fun and excitement.

Once your new string and cables are installed, and your accessories are back in place you can begin the process of tuning.